
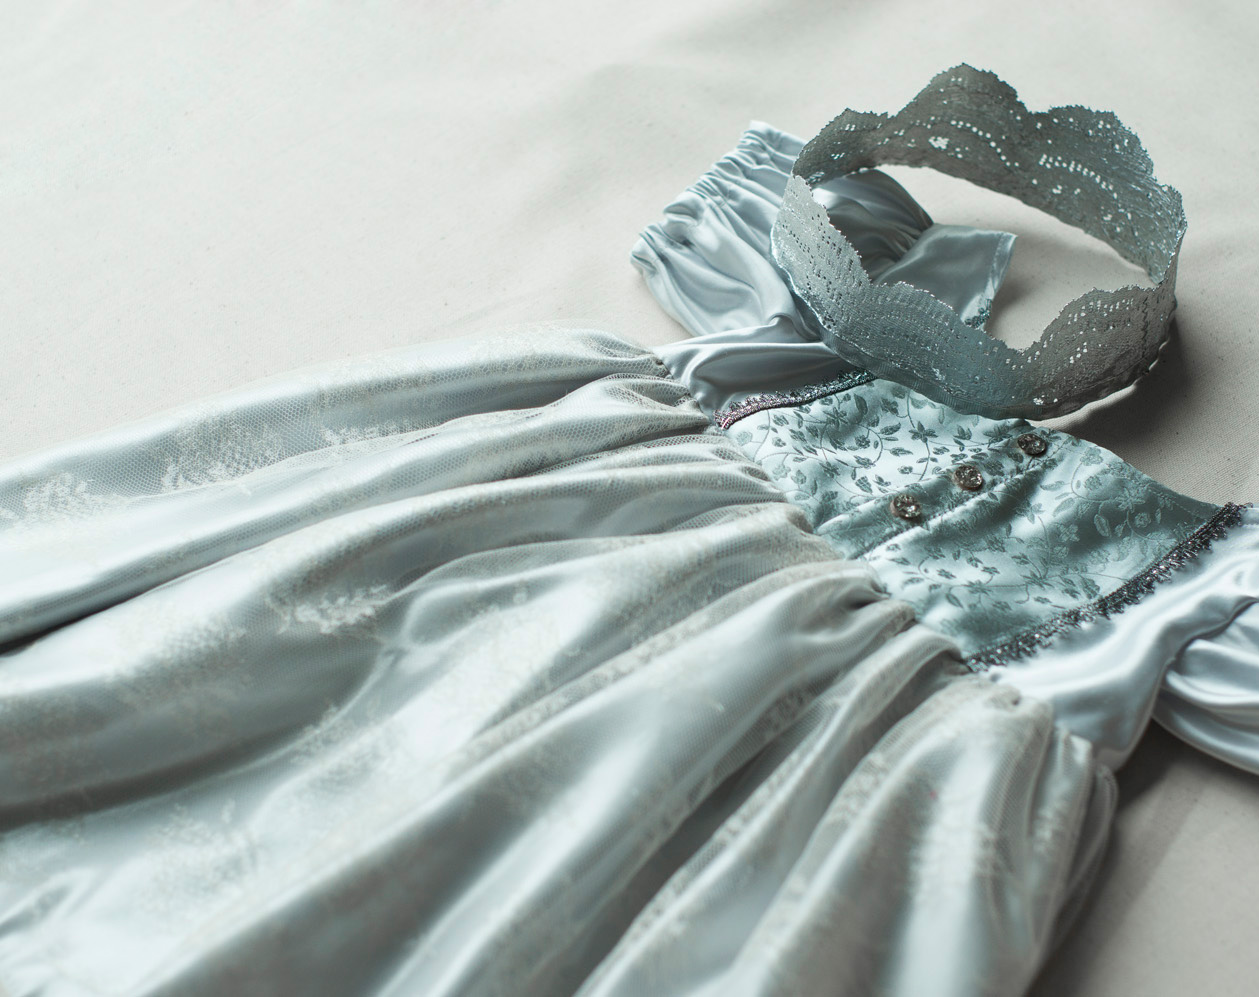
Okay so dress-up week would be a joke without at least one princess dress! Addy is obsessed with Princesses and girly stuff (along with 90% of her fellow three-year-old girls), so this dress is a must have. This one is already a full-on costume, for Halloween, just add tomorrow's crown and you're good to go!
And a note, this one is a real-live sewing project (not hard at all, but it is sewing!) so if you hate sewing, see ya tomorrow. ;)

There are so many ways to customize this dress, the easiest of which would be choosing amazing colors and trims. But feel free to lengthen the sleeves, make a short ballerina-style skirt, or add extra ruffles. Note that I used a serger in this how-to but you definitely can use a regular machine.
Princess Dress How-to

What you'll need:
- Main fabric for your dress (I used silver/blue) - 1 1/2 yds+ depending on the size of your child.
- An overlay fabric for the skirt, tulle or lace (I used a cream netting) - 1 yd+ depending on the size of your child
- A contrasting fabric for the bodice detail (I used bluish floral) - 1/8 yd (a scrap!)
- Bodice pattern downloaded from here: http://www.burdastyle.com/patterns/child-summer-frock
- A short length of velcro
- 1/4" elastic
- Various trim/buttons
- Fabric glue (I used Fabri-tac)
- Scissors
- Sewing machine/supplies
Child's Measurements:

Pieces to cut out:
- Sleeves: Measure the armscye (arm hole) length on your bodice pattern and double that length--this is the length of your sleeve piece. The height is however long you want the sleeve to be plus 2". Cut out 2 rectangles with these measurements. (The armscye on my pattern was 10" and I wanted the sleeve to be 3" long, so my rectangles were 20" x 5".)
- Elastic for sleeves: Cut the elastic to fit your child's bicep measurement plus 1/2" for seam allowance.
- Accent pieces for bodice: Follow cutting instructions below, cut from accent fabric.
- Back bodice: Use the downloaded pattern above to cut out this piece. You want the dress to be able to slip over your child's hips/waist, so make sure the combined measurements of the bodice to be at least 3" more than your child's hips/waist measurement. Cut 1 pc. on fold from main fabric.
- Front bodice: Follow cutting instructions below, cut 2 from main fabric.
- Velcro: Cut the 1/2" shorter than the length of the front bodice. (You can cut this out later when you're attaching it if desired).
- Skirt: Double or triple (for puffier skirt) the hip/waist measurement of your child, this is the width of your skirt piece. Your skirt length plus any seam allowance is the length of this piece. Cut out 2 rectangles with these measurements--one from the main fabric and 1 from the netting fabric. For example, Ad's waist measurement was 17 1/2", so my skirt was about 53" wide and I wanted it to be 15" long.

Bodice cutting:
- Add 2" to the center front of the bodice pieces. Cut out.
- Decide how wide you want your accent piece and draw a line on the pattern.
- Cut this pattern piece out (I added a 1/4" seam allowance) and add 2" to the center front like you did on the bodice pieces. Cut 2 from the accent fabric.
Sewing

Bodice
- Pin the accent fabric pieces on top of the two bodice pieces. Baste this fabric down on either side of the accent piece. You'll cover up the raw seam with trim so don't worry about that.
- Pin the bodice pieces to the back piece, right sides together. Sew the shoulder and side seams together. (I've used a serger because it was easier for me, but using a sewing machine is great.) Iron seams flat and turn right side out.
- Iron the front raw edges under 1". Top stitch to secure the turned under edge. This is where your velcro will attach in a later step.
- Overlap the front edges 1" and baste along the bottom, about 1/4" from the bottom edge. Now your bodice is connected all the way around. Set aside.

Skirt
- Fold your main fabric skirt piece in half, right sides together, with the two short ends lined up. Sew along these short ends. Do the same with the netting fabric.
- Iron the seams flat.
- With the right sides facing outward, put the main fabric skirt inside of the netting fabric and pin them together along the top. (It will look like a really really really wide skirt.)
- Using the longest stitch length on your machine, stitch the two skirt pieces together about 1/4" from the top edge. Don't backstitch or overlap these stitches. When you're finished, pull one of the threads to begin gathering the skirt. Set aside.

Sleeves
- Iron the bottom edge of each sleeve piece under about 1/2"-5/8". Topstitch to secure. This is your channel for the elastic.
- Attach a safety pin to one of your elastic pieces and feed it through the sleeve channel. Pin the elastic ends so they are flush with the edges of the sleeve. Stitch close to the edge to secure the ends of the elastic. Repeat with other sleeve.
- Fold the sleeve in half, right sides together, and sew along the short length. Turn right side out and iron seams flat.
- Using the longest stitch length on your machine, stitch around the long raw edge of the sleeve, about 1/4" from the top. Don't backstitch or overlap these stitches. When you're finished, pull one of the threads to begin gathering the sleeve. Set aside.

Putting it all together!
- Yay you've made it! Time to put the dress together. Set the sleeves into the bodice. To do this, Turn the bodice inside out, and match up the raw edges of the sleeve with the raw edge of the bodice armscye. Make sure you have right sides together. You'll probably need to adjust the gathering on the sleeve to even it out. Pin in place and sew. Repeat with other sleeve.
- Turn the sleeves right side out.
- Now you'll do the same thing with the skirt. Match up the raw edge of the bodice and the raw edge of the top of the skirt. Make sure you have right sides together, and again, you'll probably need to adjust the gathering of the skirt to tighten and even it out. Pin in place and sew.
- Turn the skirt right side out. Hurray it's a dress! You can finish the neckline anyway you'd like, I turned it under and stitched it, but you could very well glue ribbon over it to hide it or use any other method of finishing.
- Use fabric glue to attach your velcro to the center bodice. You may need to trim it a bit to fit.
- Use fabric glue to add any trim or embellishments. Now is when you'll use trim to cover up raw edge of the accent piece. Let dry.

Voila! Your little princess is ready to reign!
Tune in tomorrow for crown instructions and a roundup of some great DIY costumes from across the web!
I want that dress, heck! Gorgeous color choice!
ReplyDeleteThanks! I hope Ad likes it because I asked her if she likes silver and she said "No, I don't like silver or gay, just pink and puhpul" ;)
ReplyDelete